The PEB (Portable Energy Box – I really must find a better acronym) is complete. Well, at least electrically.
Today I installed the PV connectors after having kept the unit on charge for a few days to check the performance and make sure the batteries were still in good condition since they had been sitting around for a while. Gel cells tend to have quite a good shelf life as long as they are kept reasonably charged but not all of these have been regularly topped up so it is important to check them over before putting them into service.
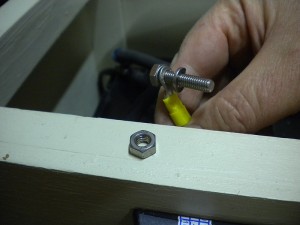
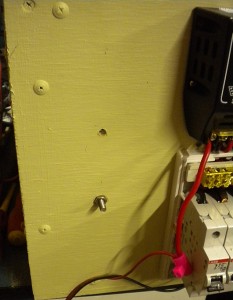
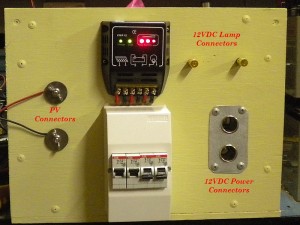
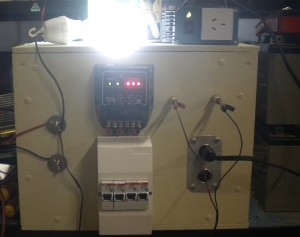
I decided to try a different type of terminal for the PV compared to the light terminals. I constructed these terminals from 6mm stainless steel (316) bolts, washers and wingnuts. Partly because I already had the bolts and partly because I thought they would be cheaper and I wanted to try a few different techniques. As it turned out they worked out a little cheaper but I’m not sure it was really worth it. Especially since the terminals I used for the lights are very good quality as well.
The nice thing about having terminals like these is that the unit becomes truely portable as you can easily connect and disconnect the PV.
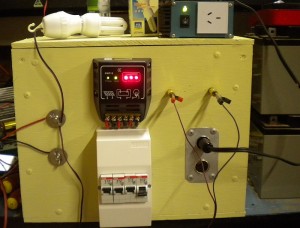
I did a final test with everthing running. The power supply substituted for the PV and the inverter and a lamp were all connected as shown in the pictures. It all worked like a charm.
All I have to do now is label everything and put a couple of handles on the box although I am reconsidering putting wheels on the unit as it quite heavy and difficult to move. This will be important if others in the family want to move it.
All in all I am very happy with the unit and I will be using it as much as i can over the next few weeks to make sure there are no problems and to see exactly how energy I can get out of it.
With the 11W globe shown I could provide simple lighting for at least 50 hours or I could power my laptop (through the inverter) for around 15 hours. I can also power anything that is made for use in the car using the cigarette lighter sockets.
The unit is capable of powering about 72W of lighting and a total of 300W of power in it’s present configuration. Of course, I would get less than 2 hours of use at that rate.
One final note about the wiring. Because the regulator switches the negative rail, the positive supply is the common. That means that all the circuit breakers are connected to the negative supply. This seems odd to many people who know a bit about electronics since the negative suppy is usually the common. However, it makes more sense to have the breakers in the side that is NOT common.
So I have one breaker for the PV, one for the battery, one for the regulator light output and one for the power. Normally, best practice is to use two breakers for the battery (on the postive and negative), especially if there is an inverter connected, but one breaker for this unit will be fine.
Even though many people omit the breaker for the PV in small systems it is important to have a breaker or at least an isolator so that when the battery breaker is off you can isloate the PV. Otherwise the PV can deliver power to the system and, if you have an inverter connected with a small (or no) load the PV can provide enough power to keep the inverter on and this presents a very real risk of electrocution on the output of the inverter.
Finally, using a current limited power supply I can charge the unit through the PV terminals. However, if I wanted to use a standard battery charger I could wire a cigarette lighter plug to the battery charger to connect to the 12VDC socket and deliver the charge that way. If I was going to use a charger on a regular basis I think I would simply add another set of terminals in parallel to the existing sockets and use the standard alligator clips that come with many chargers. But that’s a mod for the future.
Hi Mick. I love your simple solution for connecting the +ve and -ve from the PV to the box. Looks so easy. I can quickly adjust mine to become portable as well.
Thanks, Gav
Thanks Gav,
It’s not clear from the photos, but there are two washers behind the wingnut and the wires are sandwiched between them.
If you want to use the “nicer” gold connectors that I used for the light connections you can get them at Jaycar. They are the mid sized banana connectors for about $4:95 each.
Cheers